
These past few weeks have just flew by and I can't believe it's October already! It's cold - MUCH colder than its supposed to be. But I'm determined to embrace this fall season and enjoy the sweater weather while it lasts (even though some days are already coat weather). At least until I feel like pulling out my wools coats!

I found this print fabric (at Walmart!) and fell in love. To be honest, I don't usually wear maxi skirts. I'm tall and they make me feel like a giant! But at $2.00 a yard, I thought I'd try and make a maxi skirt before buying one and never wearing it..
For those of you who think a maxi skirt if JUST for summer, this post is for you. I love a maxi skirt in the summer. It's very carefree elegance. It's almost made for summer. But when I wore it for this post, it screamed fall to me! Do you agree? I would love to hear your thoughts...
This is a super easy tutorial. My proof? I made this the day before my sister's baby shower, when I realized I didn't go shopping for something to wear!
Materials:
2 Yards (less/more depending on size and how much "ruffle" you want on side)
Elastic Band
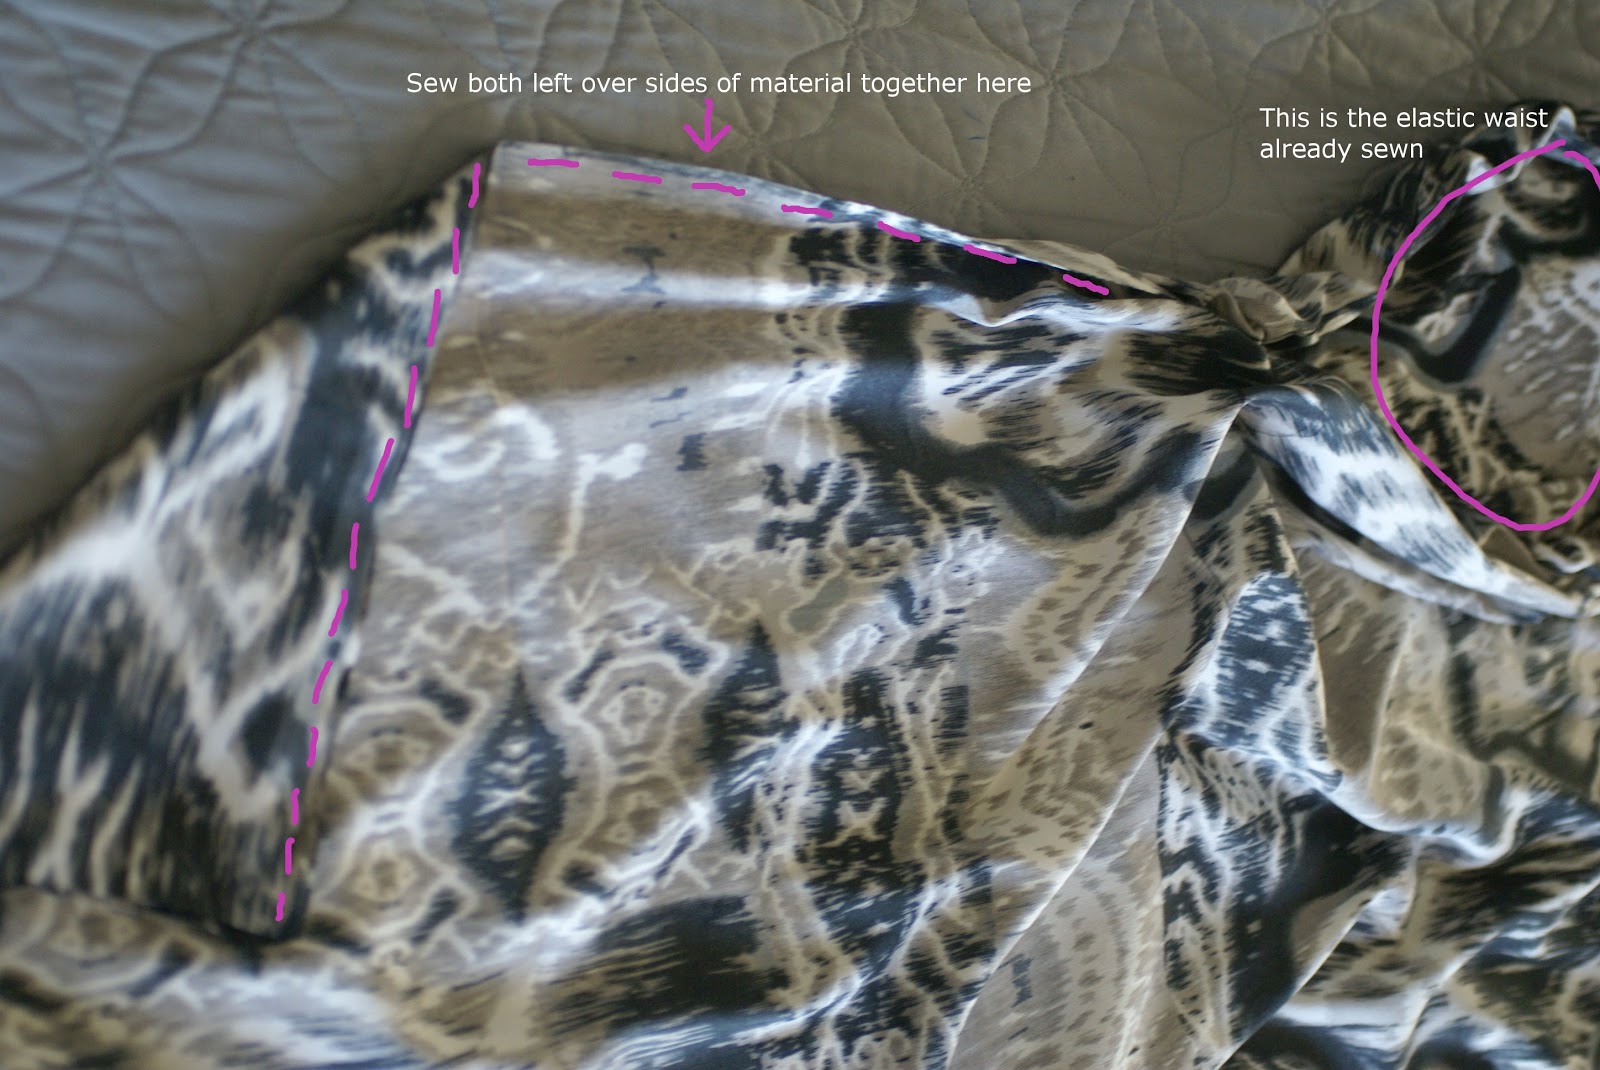
Take the material and wrap it around you, having the exact center at one hip and all the left over on the other side. Mark that spot on both pieces of fabric of what fits your waist. (With a pin line inside or with 2 safety pins) This picture best explains what I'm trying to say:
 \
\
(see below picture- measure, than pin)
Sew along the pins, removing as you go and you only need to do this until the marked spots.


(I've marked my waist size with a pen line and than pinned it)
Slip on the skirt (in its very weird condition) and measure the elastic as tight as you will want the waistband. Sitting higher on your waist or at your hips? Mark that spot again. Slip off and sew the elastic ends together. Cut off excess.

Pin and sew down the marked line you had made. (The one that shows the size of your waist). The interesting part is that it doesn't need to be all the way down. I did literally an inch- the width of the gap I had for the elastic.


Flip it inside out again.
Pin and sew across the top of the left over material. I don't know how but it just works...

(You can adjust how high/low you want the slit to be. With this pattern and my size, the slit goes to about my knee. If you want it higher, just cut off the excess a little more and you'll have less to sew at the end creating a higher slit. Vis versa- if you want the slit longer, buy a little extra fabric)


If you have any questions, please comment and I'll get back to you! Thanks for reading!
